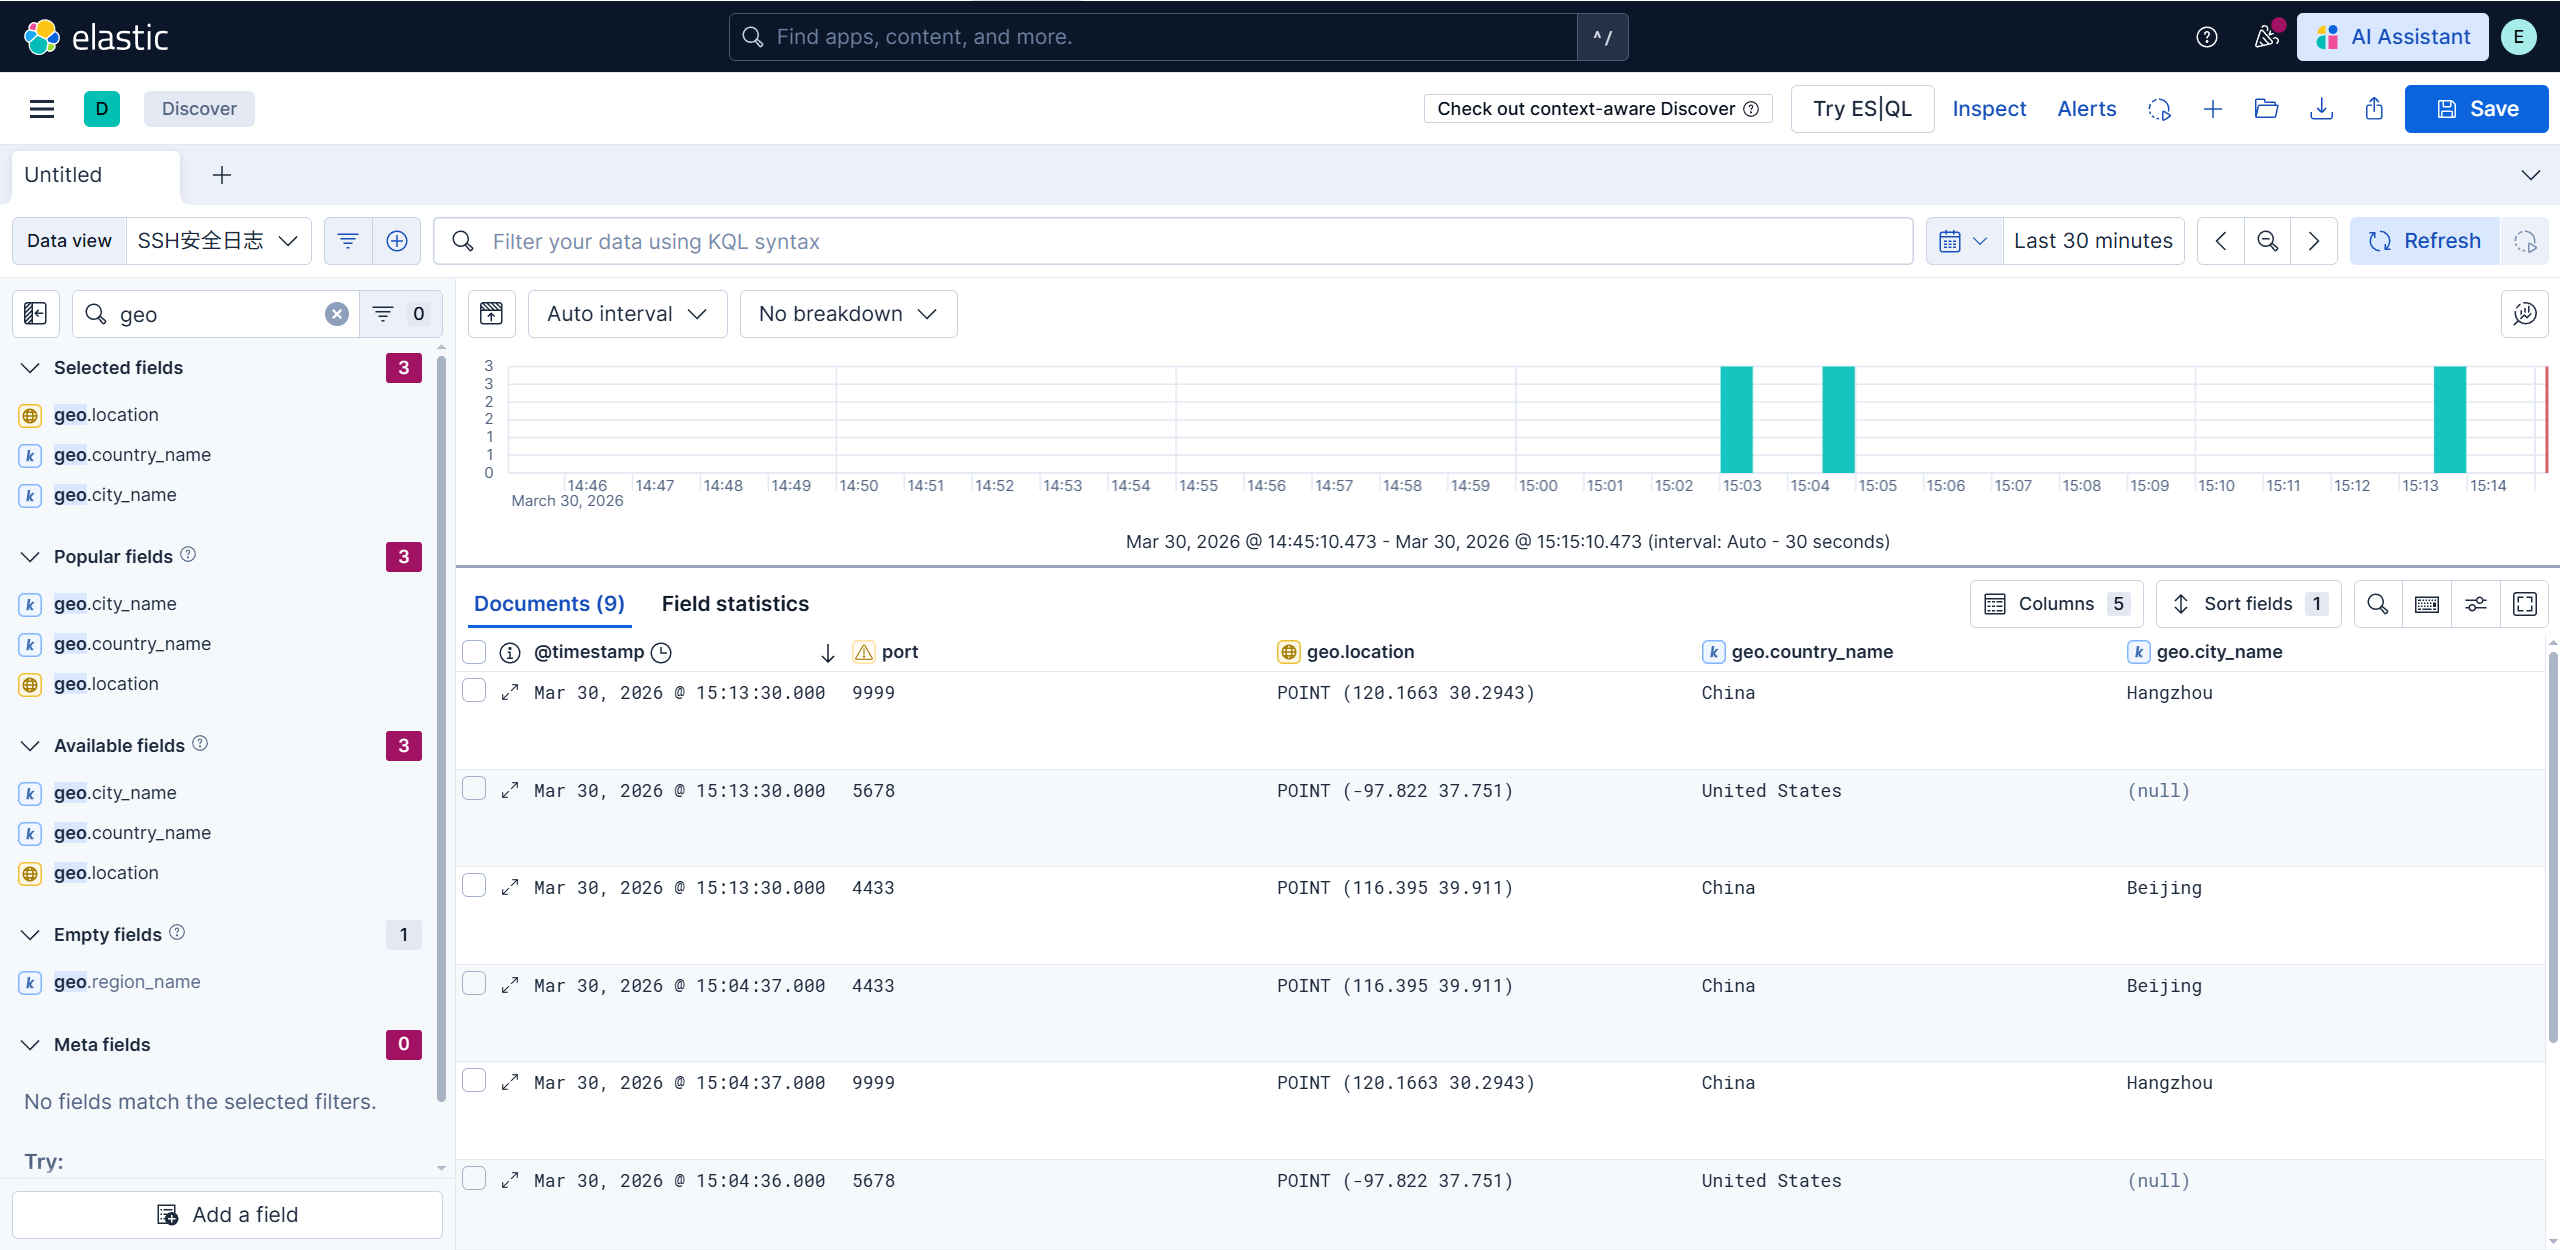
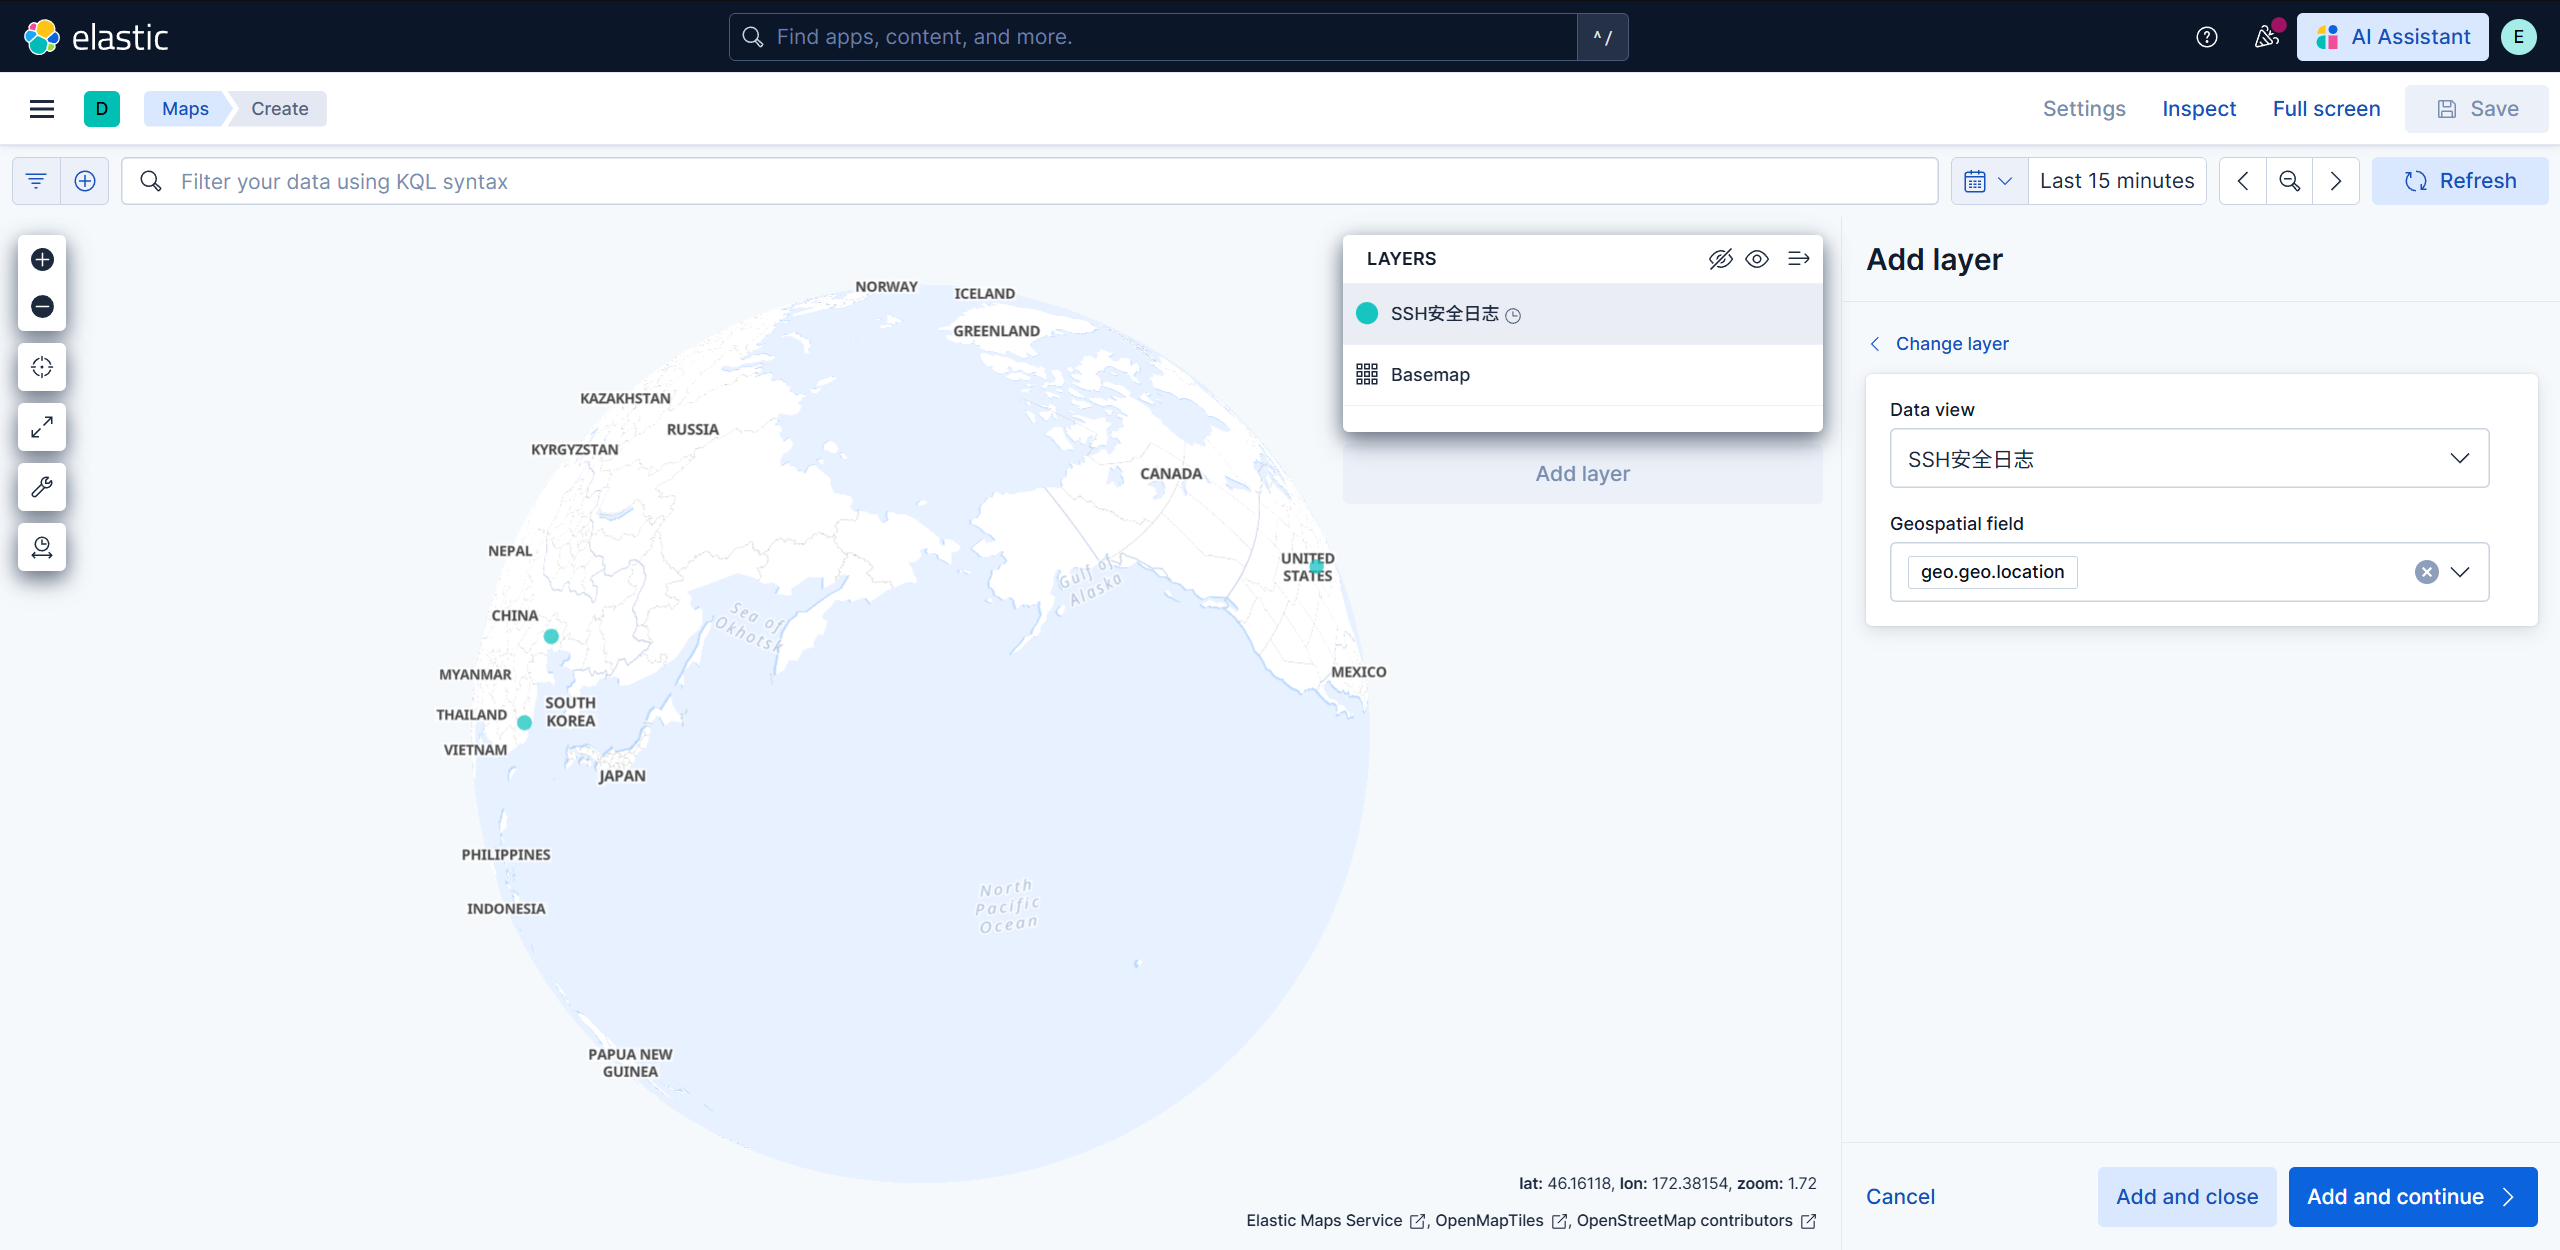
GeoIP(实时全球威胁地图) GeoIP 是一种将 IP 地址 映射到 地理位置 (经纬度、国家、城市、邮政编码)的技术。Logstash 默认内置了 geoip 插件
添加filiter字段
1
2
3
4
5
6
7
8
9
10
11
12
13
14
15
16
17
18
19
20
21
22
23
24
25
26
27
28
29
30
31
32
33
34
35
36
37
38
39
40
41
42
43
44
45
46
47
48
# 只有当 src_ip 字段存在时,才执行地理位置查询 if [ src_ip] { geoip { source => "src_ip" # 数据源字段 target => "geo" # 放入新字段 fields => [ "city_name" , "country_name" , "location" , "region_name" , "country_code2" ] # 只保留国家、城市、经纬度和代码 } } filter { grok { match => { "message" => "%{SYSLOGTIMESTAMP:timestamp} %{HOSTNAME:hostname} sshd\[\d+\]: %{WORD:auth_result} password for %{USER:username} from %{IP:src_ip} port %{NUMBER:port}" } } date { match => [ "timestamp" , "MMM d HH:mm:ss" , "MMM dd HH:mm:ss" ] timezone => "Asia/Shanghai" } mutate { convert => { "port" => "integer" "severity" => "integer" } } if [ auth_result] == "Failed" { mutate { add_field => { "event_type" => "ssh_brute_force" } replace => { "severity" => 3 } } } if [ src_ip] { geoip { source => "src_ip" target => "geo" fields => [ "city_name" , "country_name" , "location" , "region_name" , "country_code2" ] } } if [ geo] [ geo] { mutate { rename => { "[geo][geo][location]" => "[geo][location]" } rename => { "[geo][geo][city_name]" => "[geo][city_name]" } rename => { "[geo][geo][country_name]" => "[geo][country_name]" } remove_field => [ "[geo][geo]" ] } } } systemctl restart logstash.service
但是当前的es其实并不识别这几个新加入进去的字段,所以需要重新定义索引模板
1
2
3
4
5
6
7
8
9
10
11
12
13
14
15
16
17
18
19
20
21
22
23
24
25
26
27
28
29
30
31
32
33
34
35
36
37
38
39
40
41
42
43
这里使用kibana dev tools了,用postman太麻烦了 PUT _index_template/syslog_template { "index_patterns" : [ "syslog-security-*" ], "priority" : 200, "template" : { "settings" : { "index" : { "number_of_shards" : 3, "number_of_replicas" : 1, "lifecycle" : { "name" : "my_syslog_policy" , "rollover_alias" : "syslog-security" } } }, "mappings" : { "properties" : { "@timestamp" : { "type" : "date" }, "hostname" : { "type" : "keyword" }, "event_type" : { "type" : "keyword" }, "auth_result" : { "type" : "keyword" }, "message" : { "type" : "text" }, "src_ip" : { "type" : "ip" }, "severity" : { "type" : "integer" }, "port" : { "type" : "integer" }, "geo" : { "properties" : { "location" : { "type" : "geo_point" }, "city_name" : { "type" : "keyword" }, "country_name" : { "type" : "keyword" }, "region_name" : { "type" : "keyword" } } } } } } } 清除今日索引 DELETE syslog-security-2026.03.30
模拟真实IP攻击
1
2
3
4
5
echo "$(date "+%b %d %H:%M:%S" ) 1panel sshd[1234]: Failed password for root from 8.8.8.8 port 5678 ssh2" >> /var/log/secureecho "$(date "+%b %d %H:%M:%S" ) 1panel sshd[5678]: Failed password for admin from 114.55.64.10 port 9999 ssh2" >> /var/log/secureecho "$(date "+%b %d %H:%M:%S" ) 1panel sshd[9999]: Failed password for user1 from 123.123.123.123 port 4433 ssh2" >> /var/log/secure
Runtime Fields(运行时字段) 在传统的 ELK 流程里,数据是”一锤子买卖”:
采集(Logstash) :你写好 Grok,把日志切开。存储(Elasticsearch) :数据按照 Mapping 存入磁盘。一旦存进去,字段类型和内容就固定了。 展示(Kibana) :你只能查磁盘里已有的东西。
如果你今天下午开会,老板突然说:”那个 severity: 3 太冷冰冰了,我要在报表里直接看到’严重威胁 ‘四个字,而且还要能根据这个文字做饼图统计。”
传统做法 :你得改 Logstash 脚本 -> 重启服务 -> 把过去几天的索引全删了重新跑(Reindex)。这对生产环境来说简直是噩耗。Runtime Fields(运行时字段) :它给了你一颗”后悔药”。它允许你在查询阶段 ,临时通过一段代码,把磁盘里的 3 变成内存里的 严重威胁。
核心原理
1
2
3
4
5
6
7
8
9
10
11
1. Schema on Write (写入时定义 - 传统方式) 当你把数据存入索引时,Mapping 决定了数据长什么样。 - **优点**:查询极快(因为数据是预处理好的)。 - **缺点**:死板。想改字段逻辑?重写数据吧。 2. Schema on Read (读取时定义 - Runtime Fields) 磁盘里存的还是原始数据,但在你点击"查询" 的那一秒,ES 会启动一个轻量级的脚本引擎(Painless),现场计算出结果。 - **优点**:极其灵活!不需要改旧数据,不需要重启 Logstash,随时加字段,随时改逻辑。 - **缺点**:消耗 CPU。如果数据量是亿级的,现场计算会比查预存字段慢一点。
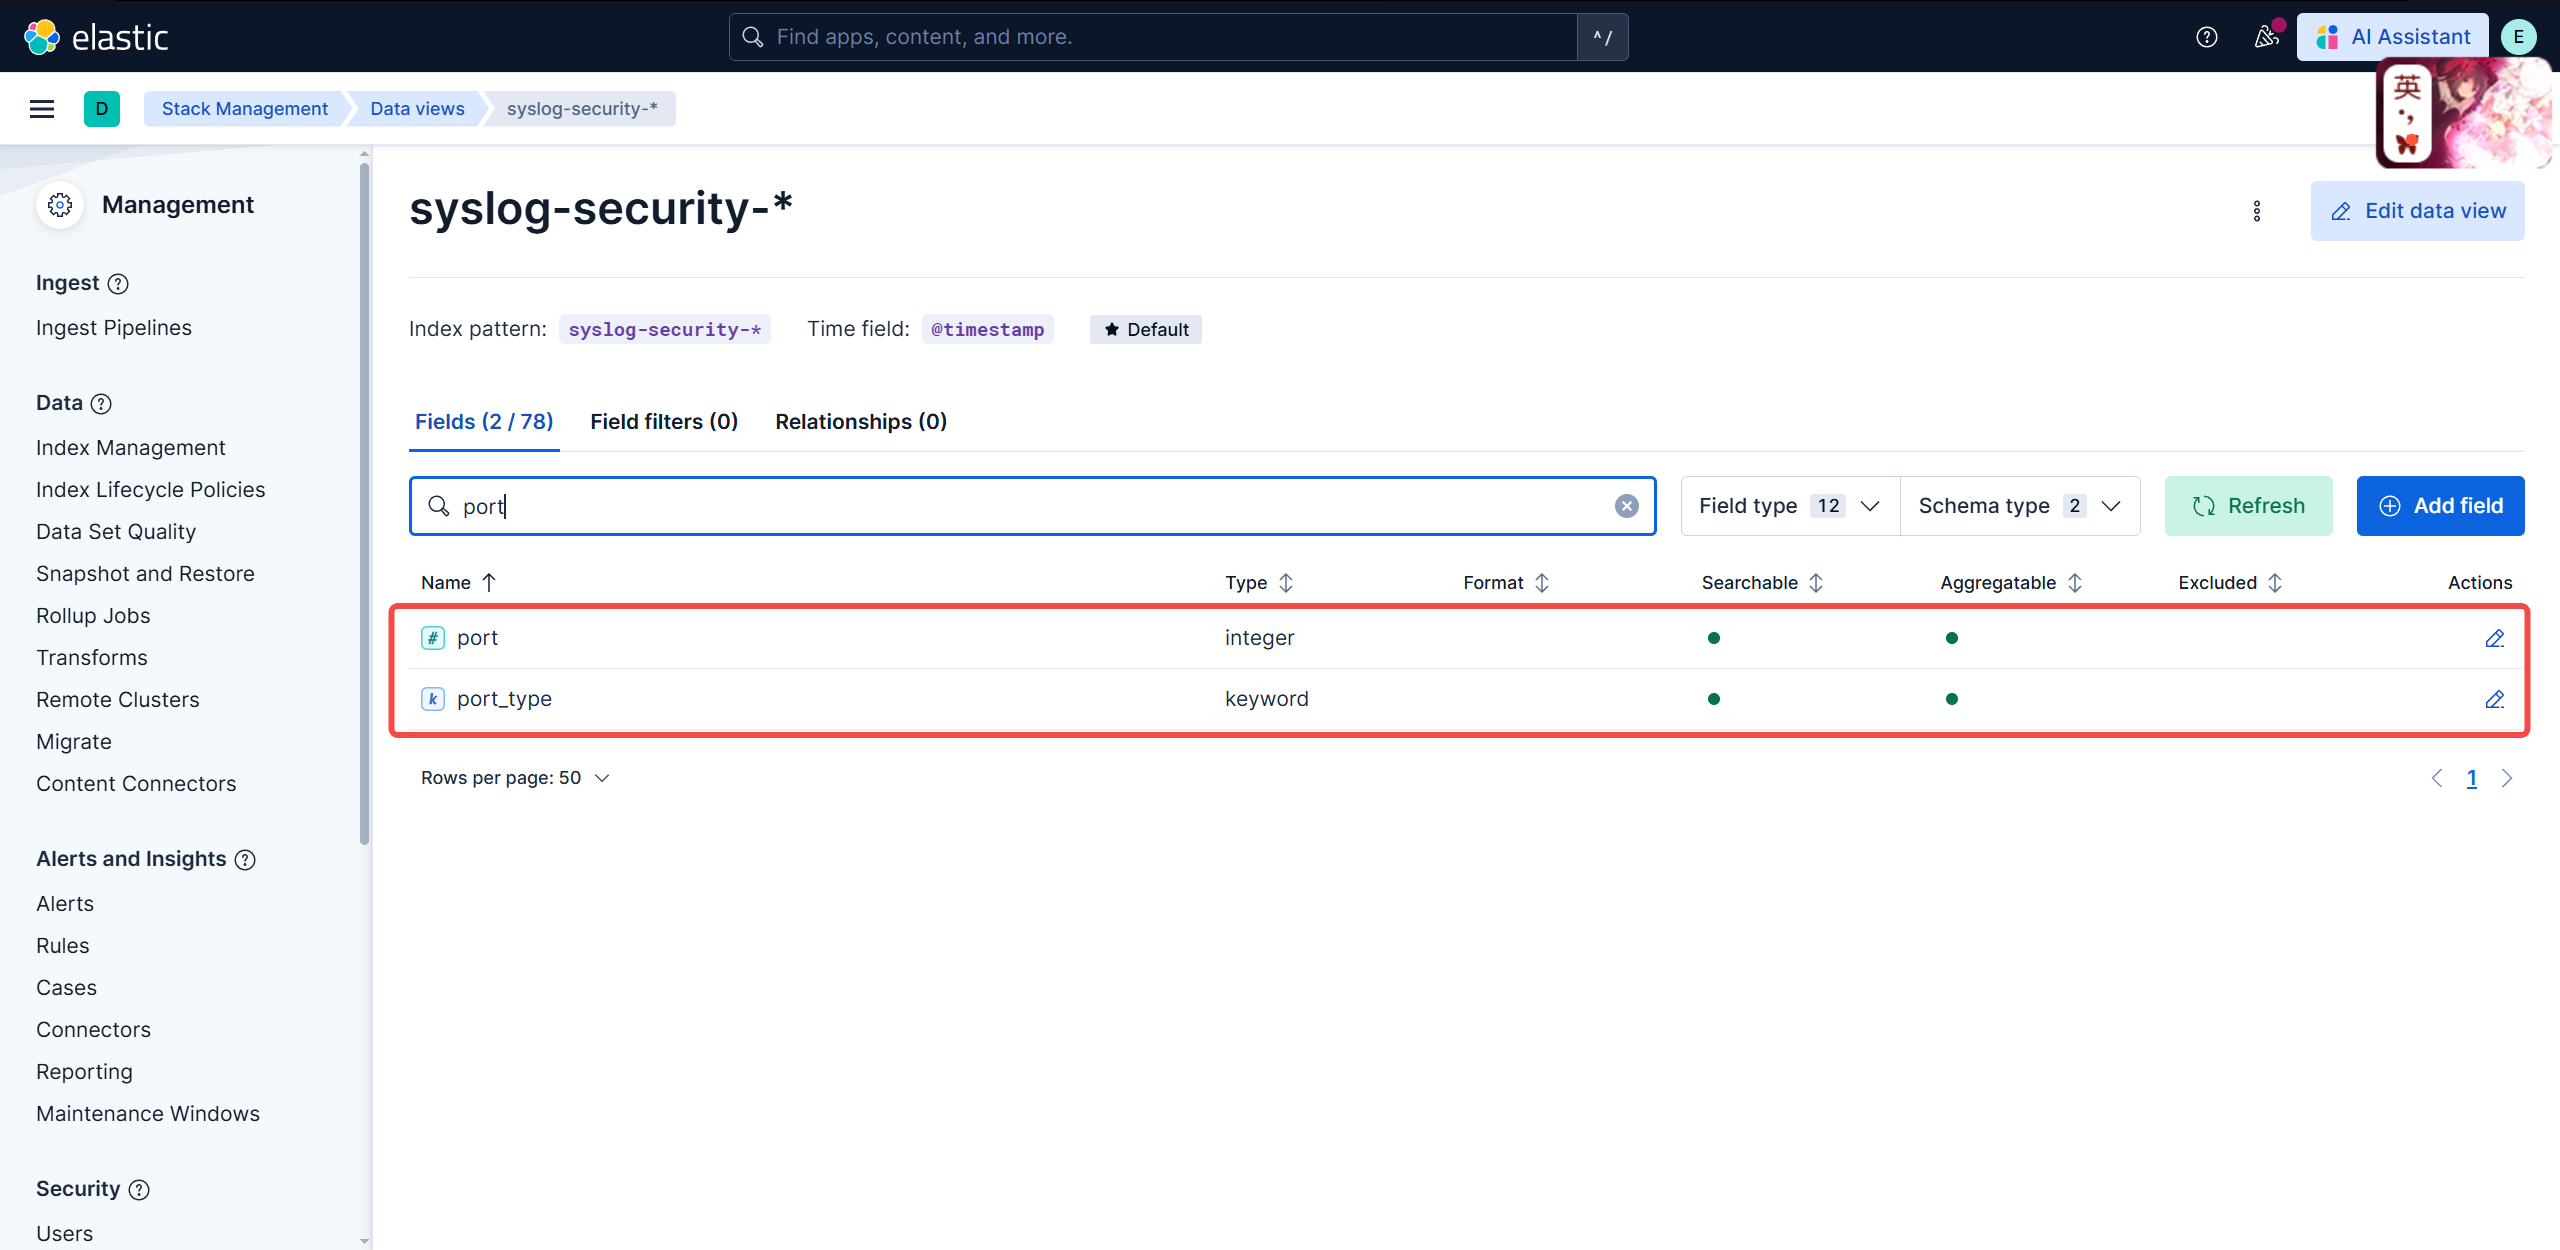
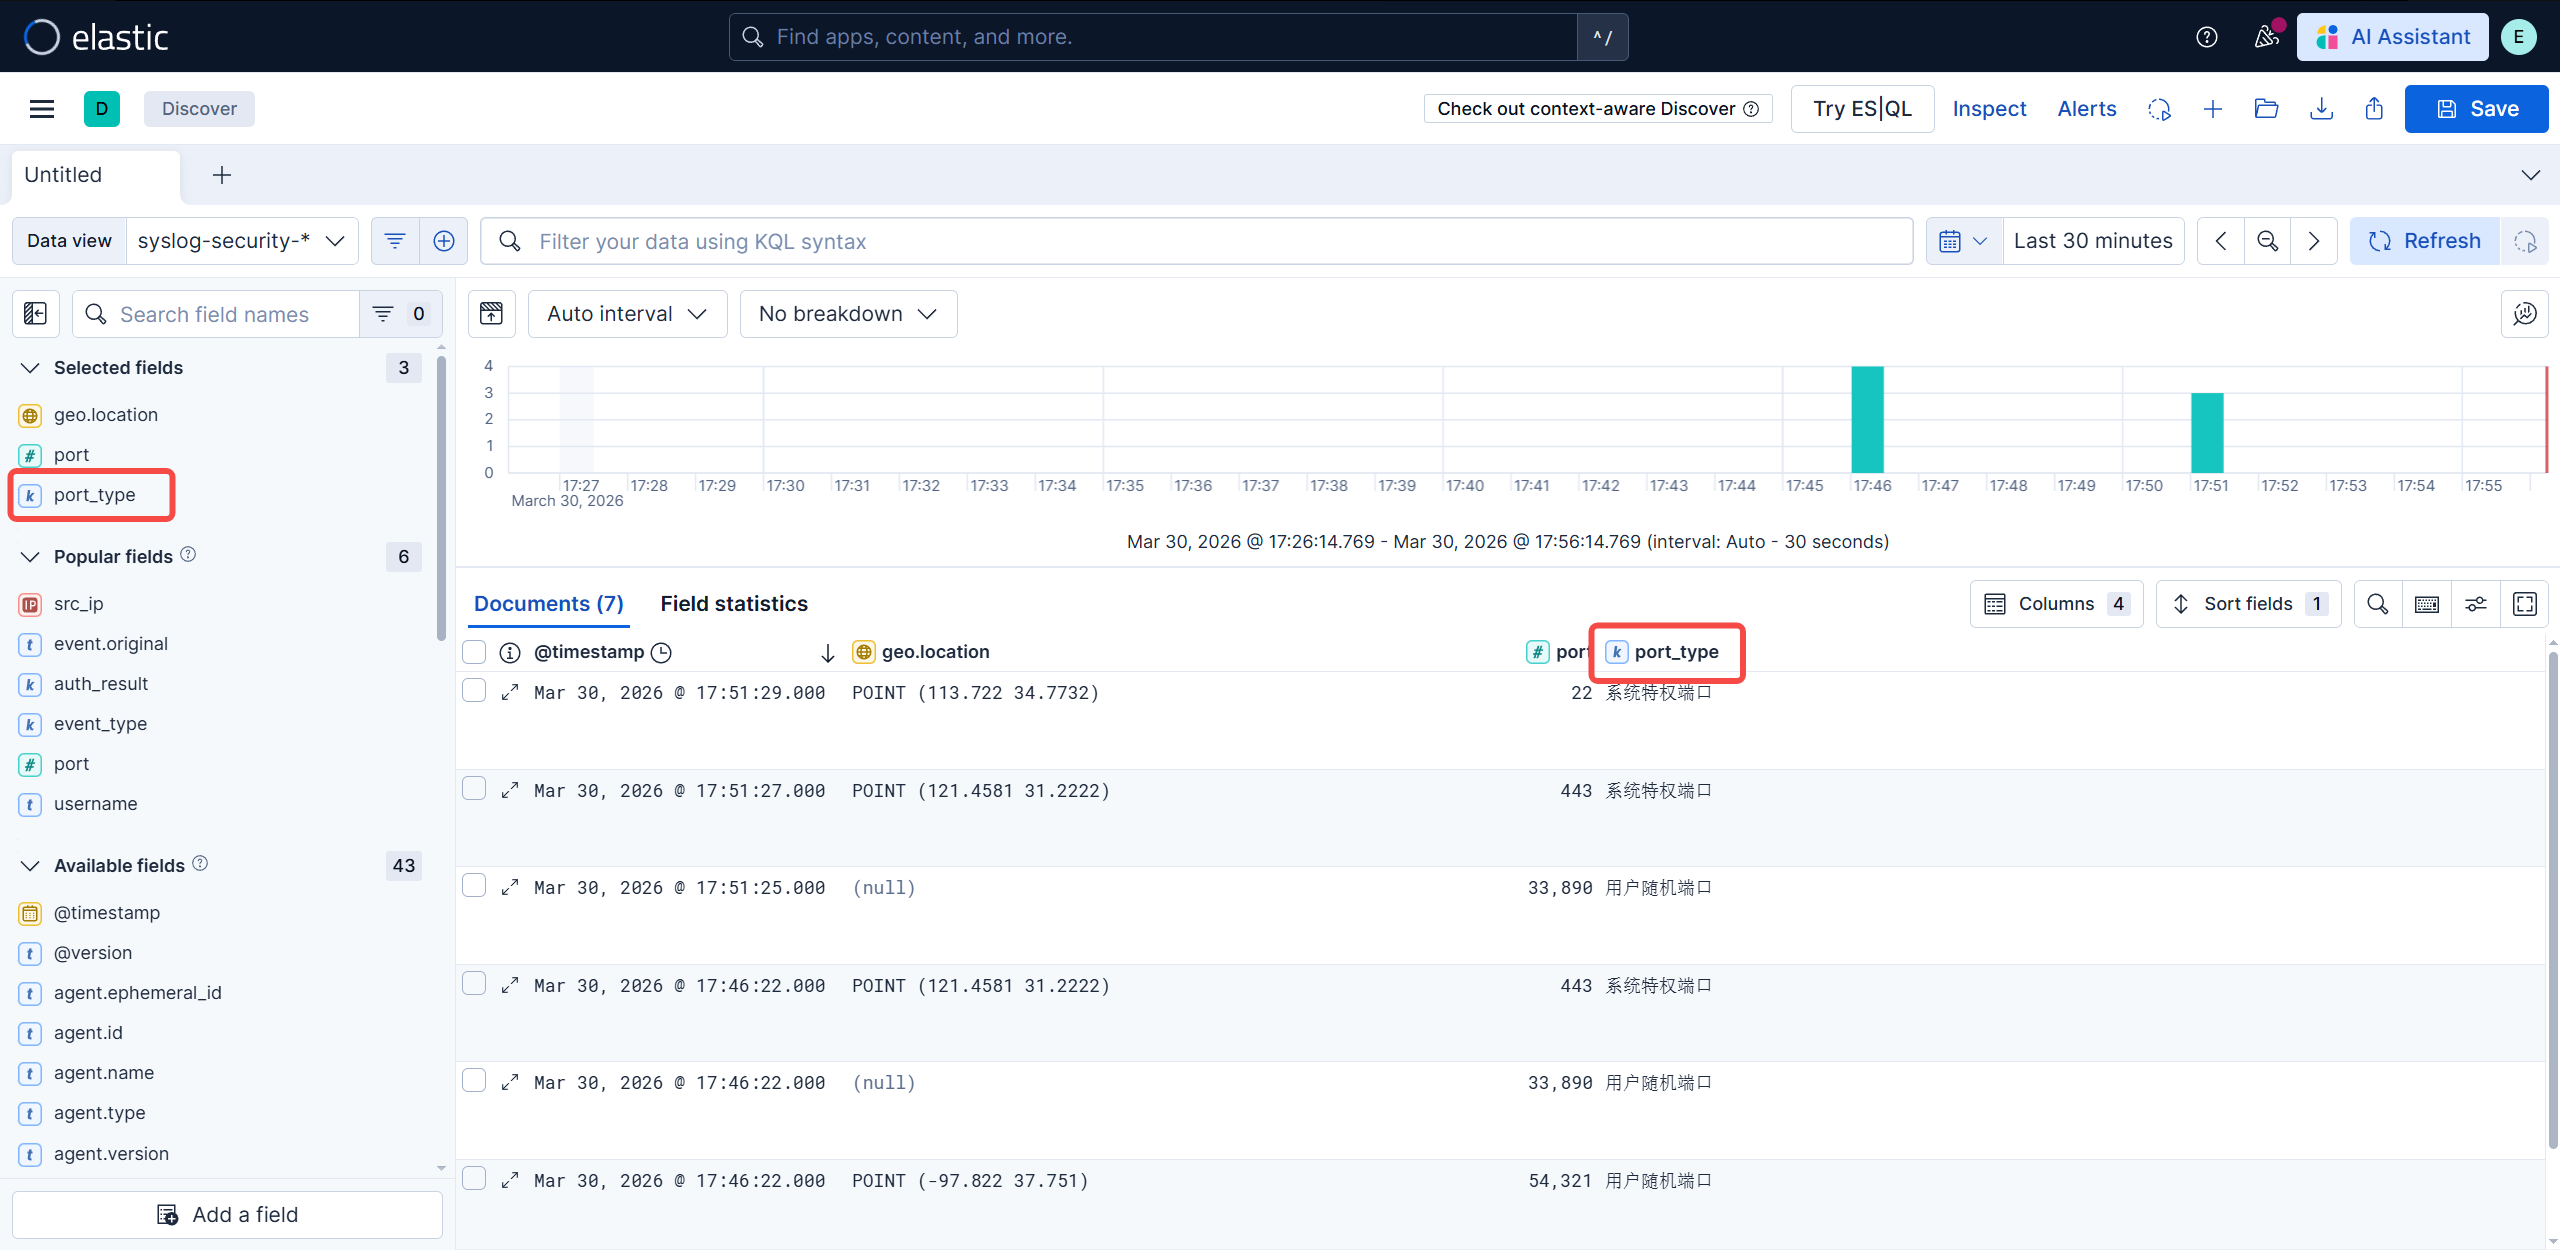
修改索引模板的运行时字段
1
2
3
4
5
6
7
8
9
10
11
12
13
14
15
16
17
18
19
20
21
22
23
24
25
26
27
28
29
30
31
32
33
34
35
36
37
38
39
40
41
42
43
44
45
46
47
48
49
50
51
52
53
54
55
56
57
58
59
60
61
62
Painless语言特点 1.语法类似 Java:变量声明、控制流(if /else、for 、while )、方法调用等都与 Java 几乎一致。 2.专为 Elasticsearch 优化:可以直接访问文档字段(如 `doc['field' ].value`)、支持聚合脚本、运行时字段等。 3.安全性高:默认禁用系统调用、文件访问等危险操作,避免恶意脚本攻击。 4.性能优异:Painless 会被编译为字节码,执行效率接近原生 Java。 PUT _index_template/syslog_security_template { "index_patterns" : ["syslog-security-*" ], "template" : { "mappings" : { "runtime" : { "port_type" : { "type" : "keyword" , "script" : { "lang" : "painless" , "source" : "" " // 1. 获取原始数据 def p = params._source['port']; if (p != null) { try { // 2. 转换为长整型进行比对 long portVal = Long.parseLong(p.toString()); // 3. 使用 params 中定义的参数 if (portVal < params.threshold) { emit(params.label_low); } else { emit(params.label_high); } } catch (Exception e) { emit('格式错误'); } } else { emit('未知端口'); } " "" , "params" : { "threshold" : 1024, "label_low" : "系统特权端口" , "label_high" : "用户随机端口" } } } } } } runtime.port_type 自定义的名称 runtime.type 类型:keyword(常用)、long、double runtime.script 代码段 runtime.script.lang 选择语言,默认painless,可选expression runtime.script.params 外部参数 runtime.script.source 表达式正文 PUT _cluster/settings { "persistent" : { "action.destructive_requires_name" : false } } DELETE syslog-security-2026.03.*
造数据
1 2 3 4 5 6 7 8 9 10 11 echo "$(date "+%b %d %H:%M:%S" ) 1panel sshd[1001]: Failed password for root from 106.11.248.175 port 22 ssh2" >> /var/log/secureecho "$(date "+%b %d %H:%M:%S" ) 1panel sshd[1002]: Failed password for admin from 115.159.152.210 port 443 ssh2" >> /var/log/secureecho "$(date "+%b %d %H:%M:%S" ) 1panel sshd[1003]: Failed password for testuser from 8.8.8.8 port 54321 ssh2" >> /var/log/secureecho "$(date "+%b %d %H:%M:%S" ) 1panel sshd[1004]: Failed password for guest from 1.1.1.1 port 33890 ssh2" >> /var/log/secure
TSVB 趋势预测与去噪 从”快照”进化到”趋势”
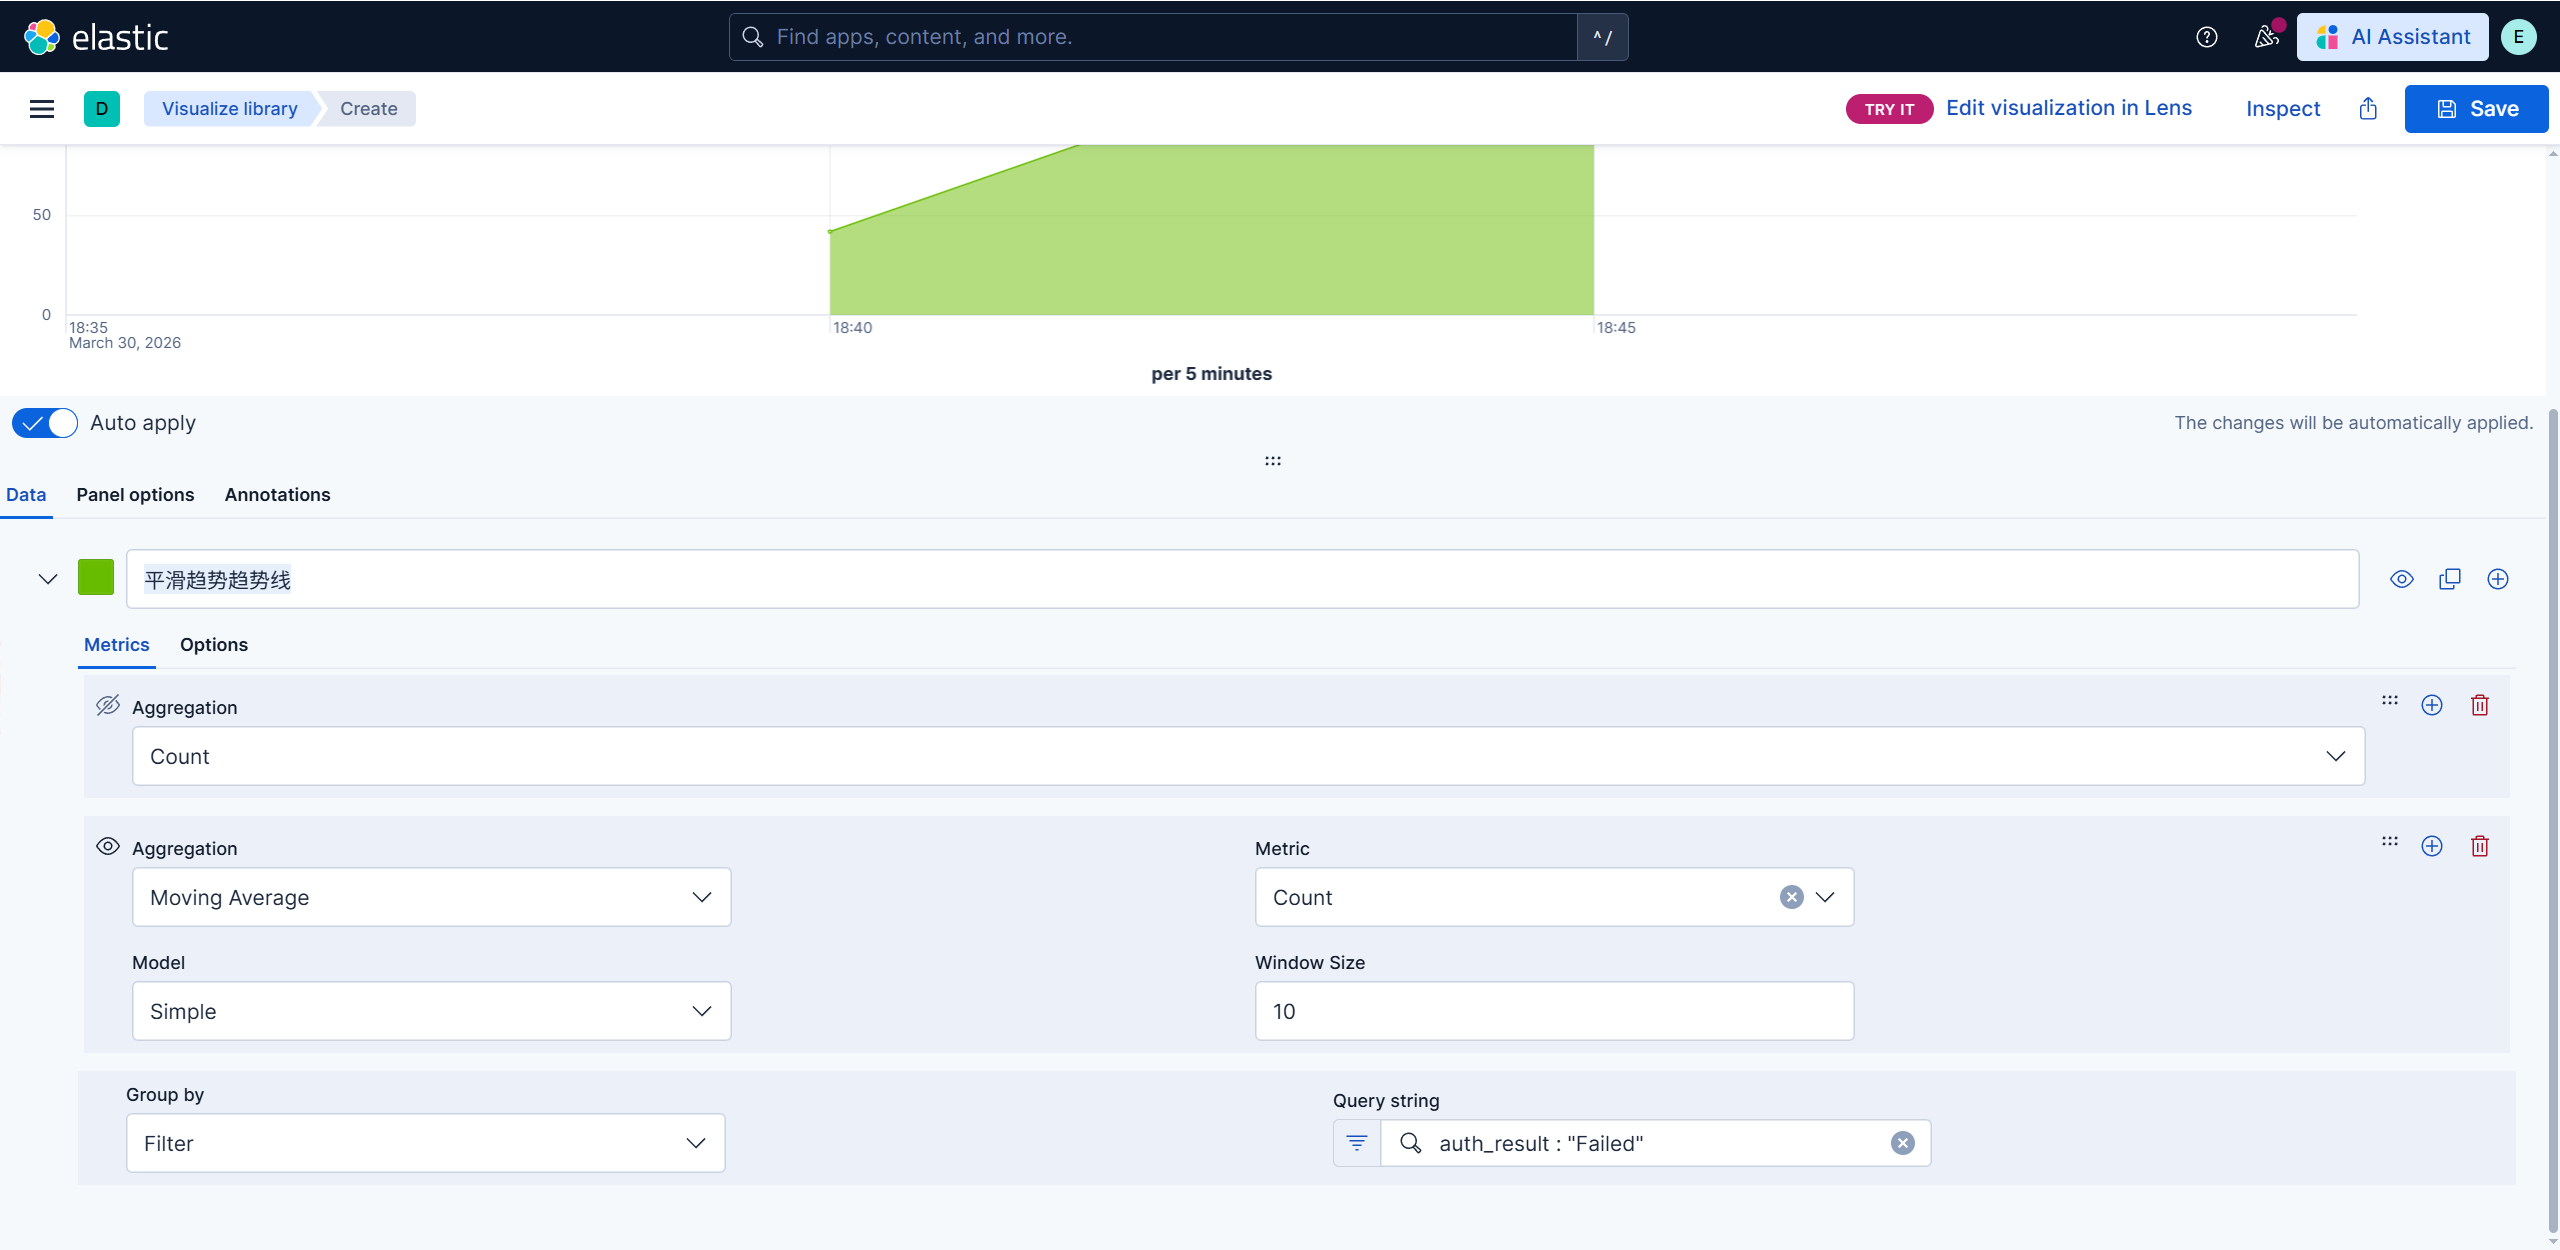
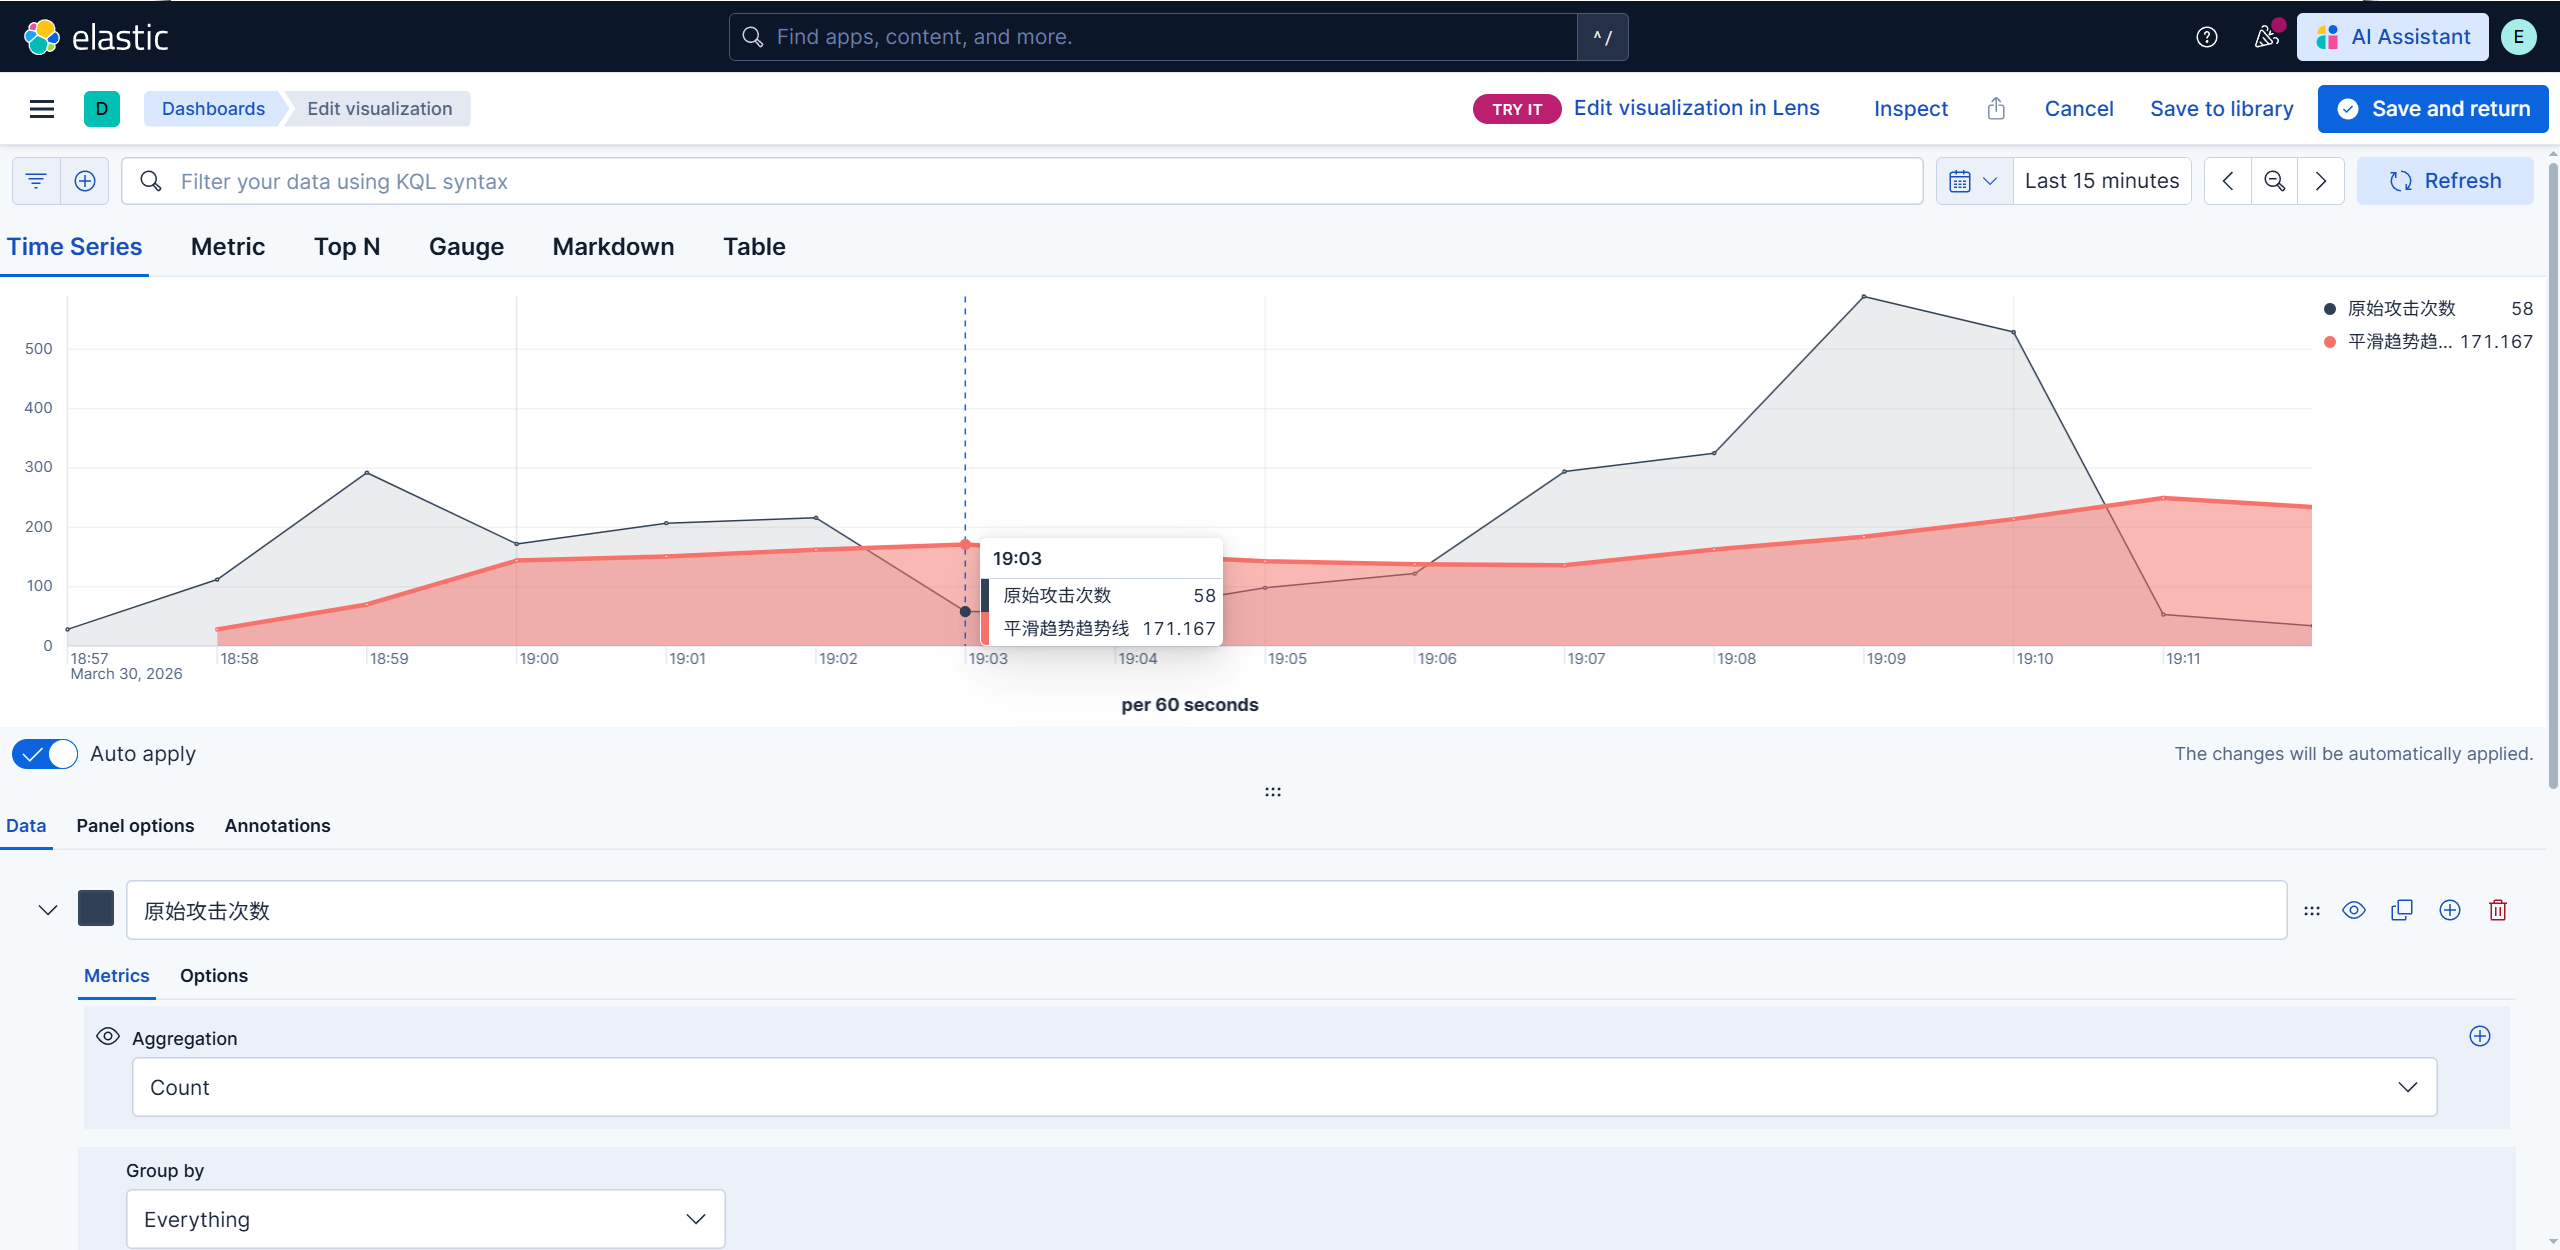
在安全运维中,原始数据是”骗人”的。去噪(De-noising):识别”手抖”与”爆破” 现象 :如果你看原始 Count,某个整点突然多了 5 个 Failed,那是用户忘密码了,还是机器在试探?TSVB 解决 :通过 Moving Average(移动平均) ,这种瞬时的毛刺会被平滑掉。如果平滑线(Trend Line)持续走高,说明攻击者不是在”路过”,而是在”驻留”尝试。指标关联(Metric Math):看”质”不看”量” 现象 :今天有 10,000 次登录失败,听起来很恐怖?但如果今天总访问量是 100 万次,那失败率其实很低。TSVB 解决 :利用 Filter Ratio ,直接计算 $\frac{Failed}{Total}$ 的百分比。比看绝对数量更能反映系统真实的受攻击程度。
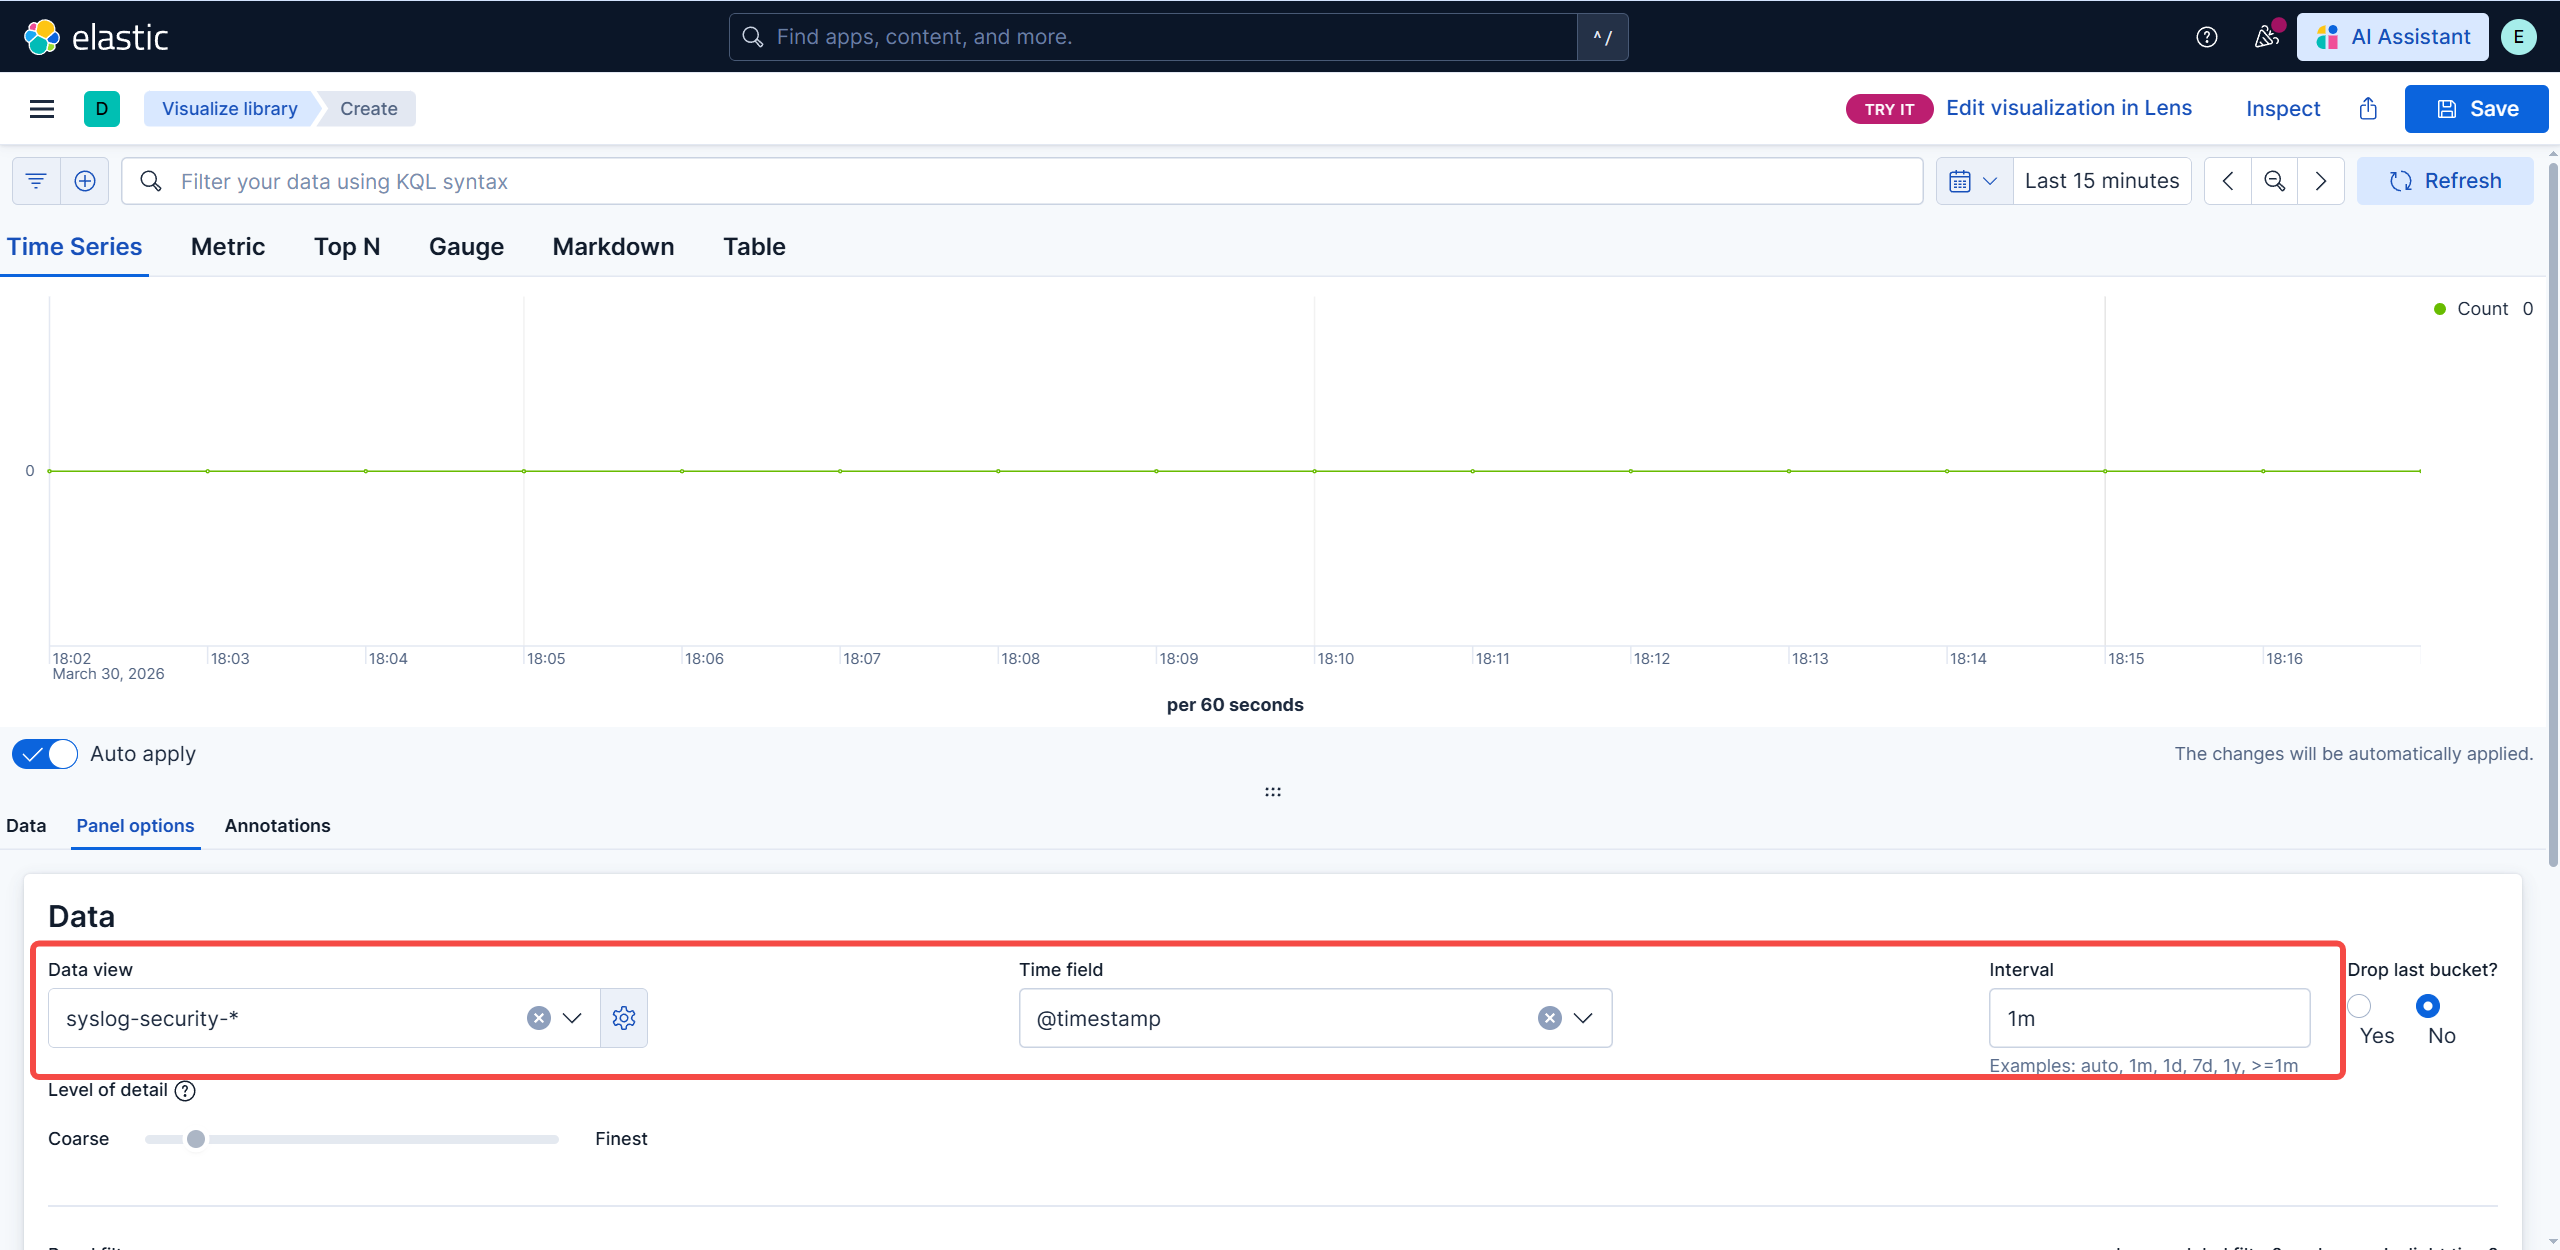
创建 TSVB
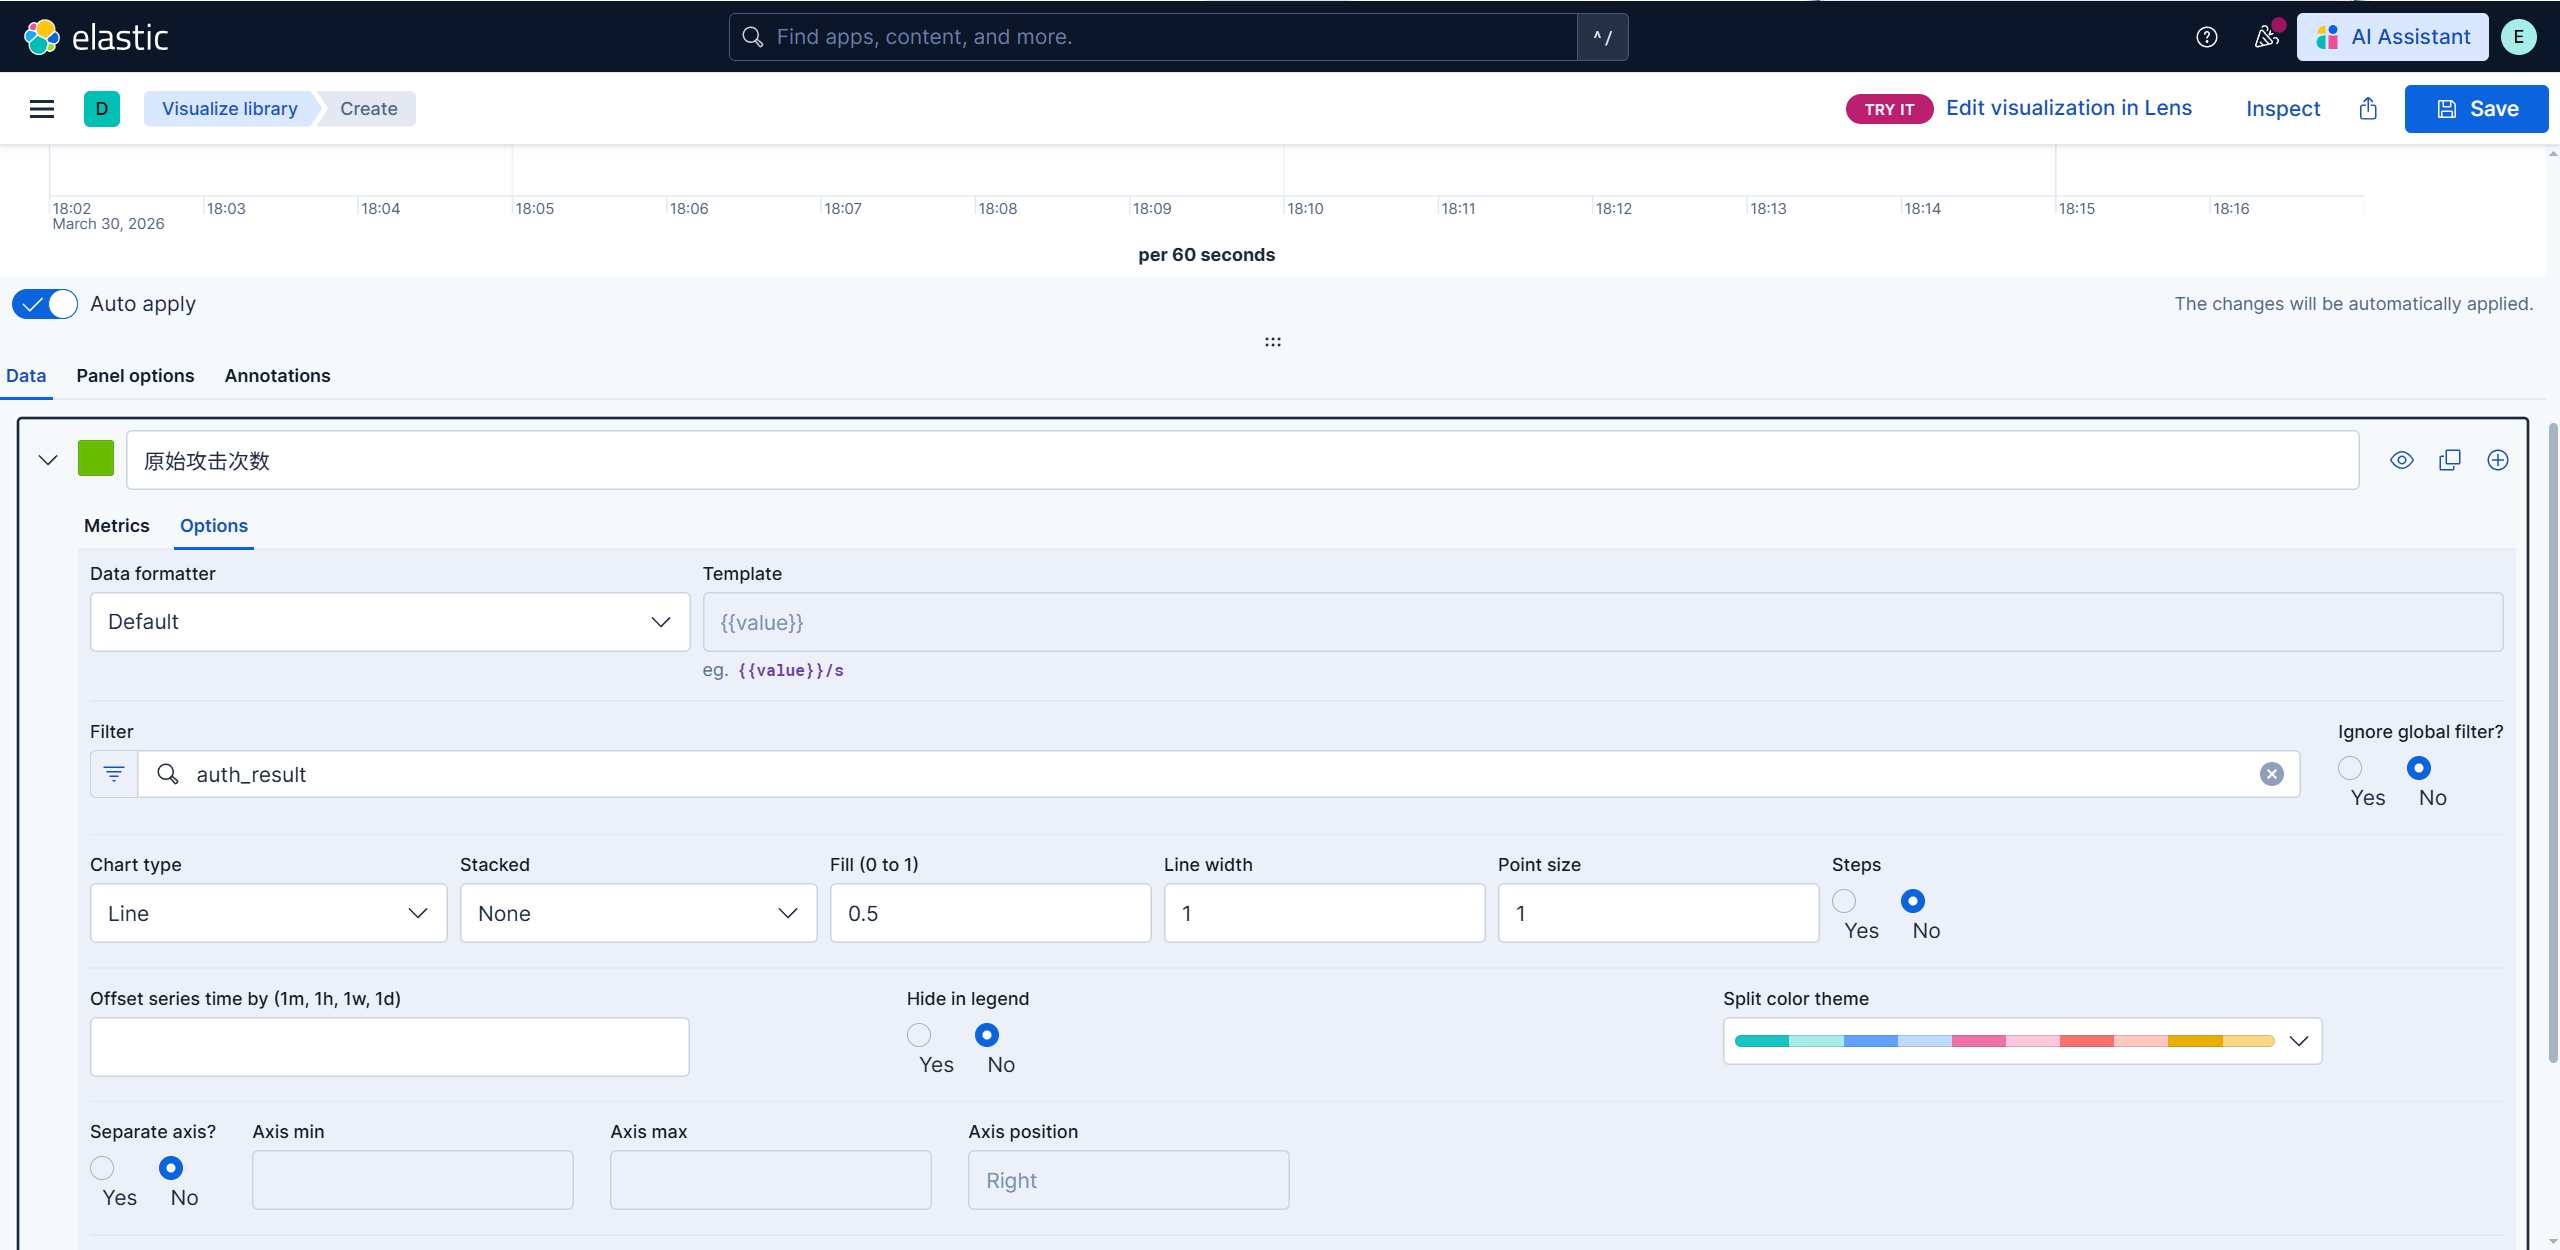
1
2
3
4
5
6
7
8
9
10
1.创建visualization(上一次使用是创建整个数据看板) Create visualization-Legacy-TSVB ****2.创建基础的count图表,填入panel options和data的信息 3.在count图表基础上,再创建平滑趋势趋势线 4.视觉分离 5.模拟攻击,我用的openclaw写入文件直接模拟攻击
平滑趋势趋势线
换色与两个图表的叠加